The Altiplano Traverse in 2024
- Jeff Cabarrus
- Aug 4, 2025
- 21 min read
Introduction
The Altiplano Traverse (AT) is a once-in-a-lifetime chance to experience the salt flats and high desert of Bolivia like few others ever will. It is a truly unique way to see these incredible parts of Bolivia and a generous lesson in patience and perspective.
Like my post on the Cordillera Real Traverse, this page is intended to:
consolidate useful information about the AT from the extremely helpful page published by The Hiking Life (Cam "Swami" Honan);
where possible, fill in any gaps in the information provided by Swami; and
provide up-to-date information about the AT in 2024.
At the outset, I'd add that the AT should only be attempted by experienced hikers with confidence in their acclimatisation, fitness and physical and mental endurance. In many ways the AT is easier than other long distance treks (regular resupply, accommodation and other people near the trail), but it still presents serious challenges (long distances, water carries and harsh conditions).

Key points
The AT is a trek across a substantial portion of the Altiplano (aka the Andean Plateau), the most extensive high plateau on the planet outside Tibet. Most of the Altiplano is located in Bolivia - and the AT exclusively traverses Bolivia - but parts of the Altiplano lie in Peru and Chile. There is no fixed route for the AT, and you'll have opportunities along the way to modify the route as you see fit. I've identified some key routing decisions below.
The key challenges of the AT are resource management and, depending on how hard you want to press yourself, enduring long distances day after day.
You could easily segment parts of the AT and complete some or all of them, particularly if you don't have time for the entire traverse. The main constraint is transport options, and while I'm not familiar with all of those options, I've mentioned some possibilities below.
The world has shifted slightly since Swami undertook the AT, including for resupply and internet access, although in some cases these seem simply to depend on your luck on the day. I've provided details of my experiences below.

My AT route
I completed the AT in September 2024 over 18 days, travelling north to south from the small town of Coipasa to the Bolivia-Chile border near Volcan Licancabur.
For the first 7 days I travelled with my friend Kevin, who I'd met a couple of weeks earlier. He struggled slightly with the planned pace of the traverse and we adapted the plan to compensate for this, which informs some of my observations about route selection below. We ultimately parted ways at Puerto Chuvica at the start of day 8. He returned to La Paz (with fairly bruised feet) and I continued solo for the remainder of the traverse.
You'll notice that my version of the AT was two days longer than Swami's traverse. Those two additional days comprised an extra day to cross the Salar de Uyuni (Day 6) and an extra day to spend time at the geysers Sol de Mañana (Day 15/16).
For context, I've included in this post:
my exported bookmarks from Organic Maps; (FN1) and
a brief description of each day, to supplement the maps.
Exported bookmarks: GPX file
Exported bookmarks: KML file
Day-by-day descriptions
Coipasa to a wild campsite at the southern end of Salar de Coipasa.
Salar de Coipasa to Salinas de Garci Mendoza.
Salinas de Garci Mendoza (Salinas) to Jirira.
Visiting Volcan Tunupa and second night in Jirira.
Jirira to Isla Incahuasi.
Isla Incahuasi to wild campsite at the southern end of Salar de Uyuni, near Cerro Uru Chuchillera.
Salar de Uyuni to Puerto Chuvica.
Puerto Chuvica to Julaca.
Julaca to San Agustin.
San Agustin to wild campsite in 'The Labyrinth'.
The Labyrinth to Laguna Hedionda.
Laguna Hedionda to Hotel Tayka El Desierto (Hotel Tayka).
Hotel Tayka to Arbol de Piedra.
Arbol de Piedra to Huayajara.
Huayajara to Sol de Mañana.
Sol de Mañana to Chalviri (aka Termas de Polques).
Chalviri to Laguna Verde.
Laguna Verde to Refugio Laguna Blanca (near the Bolivian migration office for the Paso Portezuelo del Cajón border crossing), via Volcan Licancabur.
FN1: The bookmarks of the AT are sparse because I only intended them to be a personal record of my route, rather than a navigational tool for others. For example, I didn't create bookmarks where I was following a trail already recorded in OpenStreetMaps (because to me the route I took is implied). The bookmarks are all based on real location data. I'm also too lazy to recategorise my bookmarks of the AT in order to separate them from bookmarks of the other hikes I did this trip, so you'll have the pleasure of seeing what else I've done.

Routing choices
The back-to-back long days on the AT can be harsh. Kevin came to realise this early in the traverse when he limped into Salinas shortly after 8.00 pm on our second day. At this early stage, we started to consider variations to the AT that might help relieve his aching feet.
Near Volcan Tunupa - We identified several options to work your way around and/or up Volcan Tunupa, including:
Swami's route - Climb and camp on the volcano, before descending to Coqueza.
Our route - Walk from Salinas to Jirira, staying in Jirira for 2 nights and making a day-trip up Tunupa. The downside is a longer walk to reach Isla Incahuasi the following day.
Salinas to Coqueza - Similar to our route, but you'd walk further to Coqueza instead of Jirira. In hindsight, this would have been my preference if not for Kevin's aching feet.
Salinas to Tahua - Similar to our route, but you walk to Tahua instead of Jirira. However, I suspect the views of Tunupa from the west side may be less impressive.
Crossing Salar de Uyuni
North of Isla Incahuasi - We considered splitting the journey from Tunupa into two days: first from Tahua to Isla del Pescado, and second from Isla del Pescado to Isla Incahuasi. The distance is longer in total, and I'm not sure whether camping is permitted on Isla del Pescado, but it looked like a viable route.
South of Isla Incahuasi - We split the journey from Isla Incahuasi to Puerto Chuvica into two days, with a detour to Cueva del Diablo and a night camping on the southern edge of the Salar. The visit to Cueva del Diablo was not especially worthwhile, but it helped break up the day.
Near Arbol de Piedra - I arrived at Arbol de Piedra (from Hotel Tayka) in the mid-afternoon and could have continued walking to Laguna Colorada that evening, which would have made it feasible to save a day. However, I wanted to enjoy the rocks at sunset and sunrise, and I also appreciated having almost a full day to spend walking around Laguna Colorada, which was one of my highlights of the traverse.
Near Mañana del Sol - I chose to add a day to camp near and fully appreciate the geysers Sol de Mañana. This decision was vindicated by the amazing geothermal effects the following morning, which were much more powerful than the preceding afternoon and evening. A sign at the geysers mentioned that the best time to visit is 5.00-7.00 am and I can't say that I disagree.
It also had the added benefit of splitting an otherwise large day between Huayajara and Chalviri. This meant that I felt comfortable to take the longer (but I suspect more scenic) path from Sol de Mañana to Chalviri, as well as more time to enjoy the hot springs when I arrived in Chalviri.
Going X-Country - Most of the AT can be completed by following established 4WD roads or tracks, whether across the salt flats or the high desert. However, I find walking on roads dull and jumped at every reasonable opportunity to go cross-country, and there were many. This had the benefit both of being more interesting and, in some cases, of significantly shortening my walk for the day. The terrain is relatively flat, so you'll generally have high confidence beforehand whether a shortcut looks like a good idea.
I won't try to spell out every instance where I went cross-country (and I didn't bookmark all of them on my map), but some of the more substantial sections were:
Salar de Coipasa and Salar de Uyuni - We saw no vehicles on the Salar de Coipasa. For Salar de Uyuni, as Swami says, you can simply diverge a few hundred metres from the road, set your bearing and avoid 4WDs for the whole day (although aside from morning and evening there were almost no 4WDs anyway). However, I'd mention that being off-road on the salt flats is noticeably harder on the feet, so use your discretion.
Between Puerto Chuvica and Julaca - A chance to shave off several kilometres and see some interesting scrubland and dozens of vicuñas.
The Labyrinth and its surrounds - The only 'mandatory' segment of cross-country on the AT (although even here you could do a long workaround). See my comments about 'Navigation' below.
Between Arbol de Piedra and Laguna Colorada - Shave off a few kilometres and enjoy a beautiful walk down to and around the laguna.

Transport
To Coipasa - Regardless of your home base, your first step is likely to be reaching Oruro. We started from La Paz, which has buses departing frequently and cheaply (about 30 BOB) to Oruro from the terminals of both La Paz and El Alto.
From Oruro, you may be able to take public transport directly to Coipasa, or may need to transit via Sabaya:
Direct to Coipasa - We were told after arriving in Oruro that there is a collectivo to Coipasa from Oruru, but it only runs two days a week, apparently on Tuesdays and Fridays (unfortunately I don't know at what time or the price). You'd need to make further inquiries at the bus station for the details.
Transit via Sabaya - The same company runs semi-regular collectivos that travel south-west towards the Bolivia-Chile border, which will stop at Sabaya if you ask them. You're paying full freight, as if you were completing the journey to the border, so the cost is around 70 BOB per person.
Having reached Sabaya, the next step was more difficult than we expected, as we tried to find a taxi that would take us to Coipasa. Most of the taxi drivers in the village simply refused to make the approximately 1-hour (and it turned out relatively easy) drive to Coipasa. After two hours of attempting to negotiate every driver in the village down from their cartel price of 300 BOB, we found only one driver who would even make the journey. (The driver's wife had accepted 280 BOB, but he refused to come out of the house at that price, so 300 BOB it was).
From the border to Uyuni - Your goal is to find a ride with one of the touring 4WDs returning from the border to Uyuni, having dropped most or all of their passengers at the border. There will be dozens of 4WDs, but most of them are not viable candidates - many are starting a fresh tour with new passengers from Chile and won't arrive at Uyuni for several days.
The 4WDs will start arriving headed towards Chile at around 7.30 or 8.00 am - these you can safely ignore. They will return headed towards Uyuni around 9.00 am, which is the wave you want to catch. In my case, the hostel staff and park rangers were exceptionally helpful in identifying and speaking on my behalf with cars that might be viable candidates, so I barely had to do anything!
I ultimately ended up joining the tail end of a tour, with its only remaining participant being a fellow Australian, and paid 150 BOB for the ride to Uyuni. Much to my surprise, the ride included a delicious lunch and a visit to the Ciudad de Piedra, another spectacular set of rock formations!
Other options identified along the way - For those thinking about doing a variation to the AT, or those who would feel more comfortable knowing they have escape options along the trek, I've included some notes below. I haven't actually used any of these options personally, so I'd recommend you make extra inquiries:
From Tahua (near Volcan Tunupa) to Oruro - According to Kevin, based on a previous trip he made to the area, there should be a bus from Tahua to Oruro. Unfortunately that's all the information I have.
From Puerto Chuvica to Uyuni - We were told there was a daily bus from Puerto Chuvica to Uyuni. However, even though Kevin started his return journey to La Paz from here, he never found the bus and instead hitchhiked to Uyuni.
From Chalviri (Termas de Polques) to Uyuni - During my night at Chalviri, many tour guides with apparently empty 4WDs had stopped to enjoy the hot springs for themselves. I didn't ask, but I suspect at least some of them would be returning to Uyuni the next day. If you weren't interested in visiting Volcan Licancabur, Laguna Verde or Laguna Blanca, you might be able to find a ride with them to Uyuni.

Accommodation
Coipasa - Based on door-knocking in the plaza, it seems there is no longer accommodation available in this part of town. However, there is a large hotel called Don Beto clearly visible at the north-west end of town (and marked on OpenStreetMaps).
As it happened, as we were walking towards Don Beto, we struck up conversation with a local woman who offered us to stay with her. We ended up staying in her laundry for 20 BOB per person (which felt like a rewarding bargain after the enormous taxi fee to reach Coipasa).
Salinas - There were several hotels open and available on the plaza when we arrived. We booked a twin room in Hotel Panturani at 70 BOB for both of us.
Jirira - There is only one combined hotel-hostel in Jirira, the Hostal Doña Lupe, which seems to be the lifeblood of the town. The owners were a lovely family who also ran the in-built and only shop in town. We paid about 30 BOB per person per night to stay here.
Isla Incahuasi - You can camp in certain spots as directed by the local rangers. Presumably you would normally need to at least pay the island access ticket for this privilege, but the rangers waved me in, encouraged me to rest and never got around to charging us, so we stayed for free.
Puerto Chuvica - Puerto Chuvica has a small handful of accommodation options, but we were referred by a store owner to a lovely hotel made of salt bricks (I never got the name and it wasn't marked on OpenStreetMaps). We stayed for 30 BOB per person, but my impression was that the standard tourist price is substantially higher.
Julaca - As best I can tell, Julaca has reversed its fortunes since Swami was there in 2017. I was massively surprised to find music playing loudly in front of the shops and several 4WD tours departing when I arrived. It seems Julaca has become a standard pit stop for several tours.
A hotel is currently being built and is quite close to finished - close enough that, when I spoke with the owner of one of the shops, Almacen Bauti, she invited me to stay in the hotel. It was 30 BOB for the night (with hot water and wifi still under construction), but she suggested the price would be 50 BOB once the hotel was operating fully.
San Agustin - For the second biggest town on the AT, San Agustin was surprisingly tricky. Depending on who you asked, you could be led to believe that there was no accommodation in town.
It ultimately transpired that there was a single hotel, but it was only with the help of some generous locals phoning the owner that I managed to get a bed. The owner was out of town and made arrangements for his mother to let me into a room across the street from the main hotel building! I paid 30 BOB for the room, plus a little extra for a hot shower, but she kindly gave me a plate of pasta for dinner for free!
Laguna Hedionda (Ecolodge Los Flamingos) - At 150 BOB, this was the second most-expensive accommodation on my traverse. This was for a bed in a shared, windowless room in a dormitory building for guides rather than in the actual hotel, so I dread to think what a hotel room must cost. The price included a modest breakfast in the hotel restaurant.
Hotel Tayka - When I arrived at the hotel, I seriously thought I'd be looking for a place to camp that night. The reception initially quoted me US$200 for a room in the hotel, which was more cash than I had remaining for the rest of the traverse!
After asking for a more economical option, they offered a shared room with the guides for US$25 (which somehow converted to 174 BOB - luckily for me, but it probably should have been higher). It came with a towel, the best hot water on the traverse and a solid buffet breakfast included, so after the initial bill shock I settled in to enjoy it.
Arbol de Piedra - The park ranger on duty when I reached the Arbol, Sidillo, generously offered for me to sleep on the spare mattress in his cabin and shared dinner with me. The only downside was having to tolerate his strong desire to talk about chicas.
It sounded like this was common practice, as he'd been visited by some cyclists recently (and I later heard from a cyclist I met on the trail that some cycling blogs mention this as known accommodation). However, the ranger on duty changes regularly (Sidillo was on rotation there for 22 days before his 10 day break, after which he would be posted elsewhere) and different rangers may have different rules.
In exchange for his hospitality I gave Sidillo a Snickers bar and half a mandarin that I'd been gifted by the tour groups at the Arbol - I'd been seen walking and, after explaining what I was doing, was treated lavishly by some of the tour participants!
Huallajara - Another town that has successfully embraced an identity as a stop for 4WD tours, Huallajara had abundant accommodation options and shops, far more than you'd expect for its size. It had a bar with pool, table tennis and foosball tables, so seemed like a better than average place for a rest day if you wanted one late in the trek and couldn't wait a day or two to reach the Termales de Polques.
The first hotel I walked into offered a room and private bathroom for 200 BOB. After asking for something cheaper, the owner guided me over to a neighbouring hostel (apparently owned by the same family), where I stayed in a room with an especially comfortable double bed and had a very hot shower for 50 BOB.
Chulviri - A tiny town of exceptionally friendly locals. Its rhythm seemed to involve dozens of tourists arriving in 4WDs in the morning, followed by quiet evenings with only locals and off-work guides in town.
I stayed at an unassuming hostel made of mud brick and with very comfortable beds for 30 BOB. There were no showers but, as the owner pointed out, who needs them when there are thermal baths!
Refugio Laguna Blanca - Despite the labels on OpenStreetMaps, there was only one accommodation option and it's actually a hostel rather than a refugio. I stayed the night for 70 BOB - it sounded like this was the tourist price and probably negotiable, but by the end of the traverse I didn't have the energy to negotiate.

Food and water
General observations
Before starting the AT, I decided not to carry a camping stove. The main rationale was that cooking my own food would require me to carry more water and add too much weight to my pack. It meant that, when I wasn't in towns, I ate plenty of canned fish, crackers and granola. I didn't see this as a problem and still think it was a sensible decision. As a general rule, I wanted to carry enough water to keep me hydrated for however many days it would be until my next anticipated restock, plus an extra day in case of emergency.
Not knowing exactly how much I'd consume per day, I started the traverse carrying 5 litres for the initial two-day stretch. I quickly realised that, for me, this was more than I needed - my body is apparently fine with only 1-1.25 litres of water per day, so my standard carry became 3 litres for two days. This was great news from a carry-weight perspective!
I'd recommend starting conservatively until you're confident about what your body needs in this environment. While I'm apparently a camelid (I'd say a vicuña), most people will need at least 2 litres per day - for example, Kevin consumed around 2-2.5 litres per day.
Resupply
Unless I specifically mention it, every store described in this section stocks water (and often other drinks). It generally cost about 10 BOB for a 2-litre bottle of water.
Salinas - The best-stocked town on the AT, notably including access to fresh fruit for the first and last time. To make the most of what's available you'll need to visit multiple shops on or near the plaza.
Jirira - As mentioned above, the hotel has an in-built and reasonably well-stocked store. It's inside the hotel and not visible from the street.
Isla Incahuasi - There is a tiny shop and restaurant on the island. The shop essentially only stocks sweets, but the owner serves some lovely basic dinner, breakfast and lunch to go.
Atulcha - A small town between Isla Incahuasi and Puerto Chuvica (at least on our route), with several small shops, none of them signposted. We stopped for lunch and, with help from the locals, got one of the shopkeepers to open their door (much easier said than done).
Puerto Chuvica - We only visited the store at the entrance to the town, which was quite large but seemed to be in need of a restock. There looked to be another store but it was closed when I saw it. The hotel offered a pleasant dinner and breakfast.
Tanil Vinto - About half an hour walk from Puerto Chuvica is the hamlet of Tanil Vinto, which surprisingly seemed to have more, better-stocked shops than Chuvica itself. I took the opportunity to upgrade my supplies.
Julaca - This tiny town was also disproportionately well-supplied. I only visited one store, Almacen Bauti, which had everything I needed and more (including icecream), but there were several other stores around town. The owners also prepared a simple but pleasant dinner and breakfast for me.
San Agustin - For the second largest town on the traverse, food options were surprisingly limited and difficult to access. There is a shop inside the only hotel and several others on the main street, but mostly they are not signposted. The shops I managed to visit had relatively limited options.
Copacabana - I had a drastically different experience of this town to Swami. Far from abandoned, there were dozens of people around and the town hosted one of the best-stocked shops on the traverse, located shortly before the main plaza (I've added a marker to OpenStreetMaps). I treated myself to a can of peaches and a malt soft drink with lunch!
Laguna Hedionda - There is no store at Laguna Hedionda, but Ecolodges Los Flamingos houses a nice restaurant. The food is expensive compared to most other meals I bought along the traverse, but they were a nice treat after days of little but canned fish and crackers.
There were options for dinner (50 BOB), breakfast (a basic breakfast is included with your stay, but I bought a second big breakfast for 70 BOB) and sandwiches (15 to 35 BOB), a couple of which I ordered to go.
Hotel Tayka - Like the hotel itself, the food was expensive. There is no store, only the hotel restaurant, but they will let you refill your water bottles.
For dinner, the hotel staff quoted me US$20 (excluding drinks) and I paid up because I was otherwise understocked on food. This somehow converted to 140 BOB, and I figured "when in Rome" and paid another 25 BOB for a lemonade. While I was initially astonished at the price, it made more sense when I arrived at the restaurant that evening (in socks, flip flops, colourful beanie and dirty hiking clothes), only to be treated to a candle-lit, three-course meal!
Breakfast was included in the price of the room, and I was pleased to discover in the morning that it was a well-furnished buffet.
Huallajara - The town has several apparently well-stocked stores, although I only visited one. The hostel offered a lovely dinner and breakfast at 50 BOB for both. The breakfast was quite light (two pancakes and tea) but a tour group had left behind another six pancakes which I quickly claimed. The owner, realising I was a living waste disposal unit, then gave me some additional leftover fruit and pancakes to go!
Chulviri - The store, comprising a small cupboard in the town restaurant, was basically just a pantry with crackers, snacks and nothing substantial. However, the owner prepared me a huge pasta dinner, breakfast and two portions of eggs and rice to go.
Refugio Laguna Blanca - The hostel made dinner available (even though it sounded like this wasn't normal for them) and provided a modest breakfast. There was a selection of snacks for passing tourists, so in an emergency you could survive on that.

Other Considerations
Volcan Licancabur - The restaurant owner in Chulviri passed on some advice she received from a guide she knew, which was to stick to the right path on the way up and take the left path (which would then be on your right) on the descent. I never figured out exactly what this meant, but it did vaguely seem like staying right would mostly keep you off the scree while ascending and let you use the scree while descending.
From the trailhead, it took me 3.5-4 hours to reach the summit and about 1.5 hours to return. It was about an hour extra each way between my campsite near Laguna Verde and the trailhead.
My campsite minimised how far I needed to carry all my gear, but was more exposed to the wind than I would have liked. It was getting dark when I chose it and I decided to take the bird in the hand. However, on my way to the trailhead in the morning, I noticed a handful of viable campsites along the way, including immediately before the trailhead. If I'd known about these campsites, I would've pressed on to reach them.
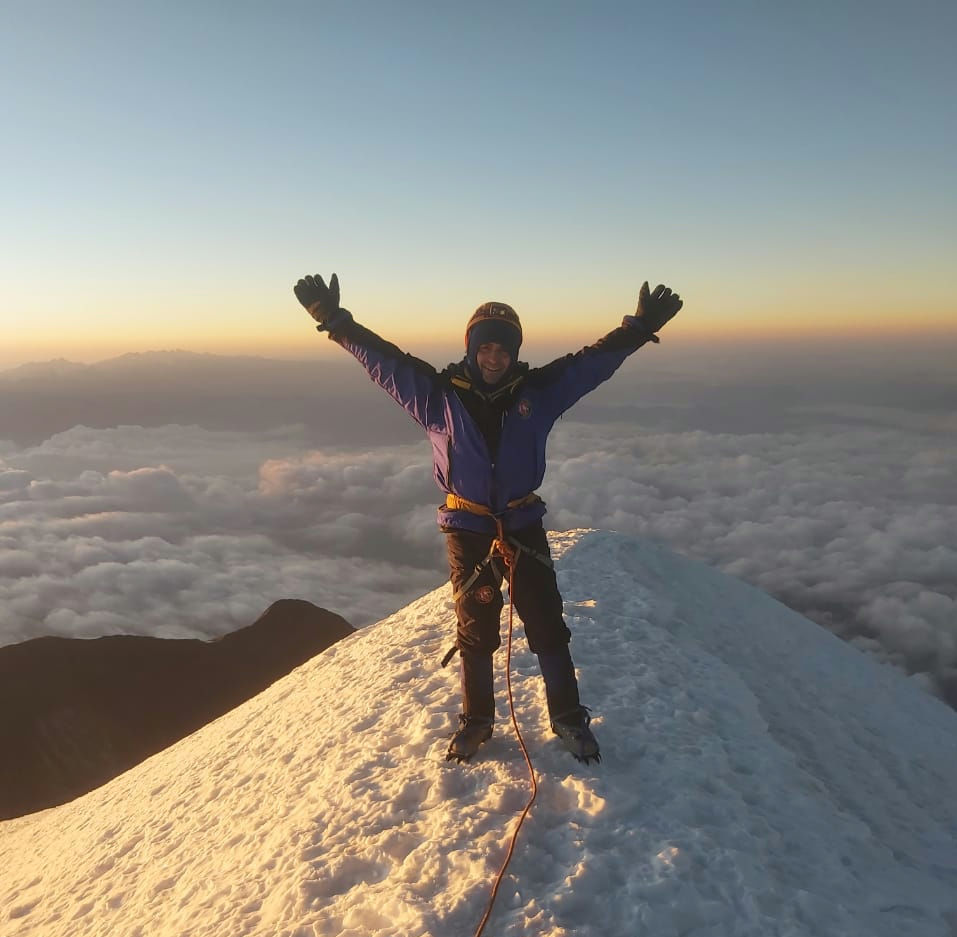
After the summit I read the Wikipedia page about Volcan Licancabur, which had two memorable facts. The first is that the UV at the summit is some of the highest in the world, which made my decision to remove my hat specifically while at the summit seem especially foolish. The second is that you can be cursed for climbing Licancabur, which was great to learn after having climbed it!
Navigation - For the most part, navigation is not especially challenging on the AT. With few exceptions, you'll either be (a) following a road or (b) setting a bearing and walking in a more or less straight line for hours, repeating the process a handful of times per day.
The one noteworthy exception for me was navigating the Labyrinth. It's a cross-country section of the traverse located a few hours south-west of Copacabana. It's an incredible place and I was thoroughly enjoying working my way through it, right up until I was surprised by a large canyon housing the stream running SE-NW marked on OpenStreetMaps. This quite severely interrupted the otherwise relatively straight path I'd managed to carve across the Labyrinth. I detoured several kilometres north-west until I eventually crossed the adjoining, smaller canyon (also visible as a stream on OpenStreetMaps) and could continue my journey south-west.
While I don't have any firm suggestions, I'm sure this section could be done more efficiently. It was the only part of the AT where I felt disadvantaged by not buying and carrying a proper topographical map.
After returning to La Paz, I came across a map of the region available at The Wall (on Avenida Illampu) for 55 BOB. I bought it as a souvenir, but you might want to consider picking up a copy before you set out.
Money - In short, you won't be able to readily access money during the AT.
Kevin learned this the hard way when, by about day 4, he found that he was running out of money. He asked the hostel owner in Jirira whether there were ATMs further along our path and was told 'no'. As best I could tell, this turned out to be accurate advice. There was a bank on the plaza in Salinas (on day 2), but otherwise I didn't see a bank or ATM for the length of the AT.
You will need to bring enough money for the entire trip. Before I started the AT, I estimated 150 BOB per day plus allowed some extra, for a total of 3000 BOB. Ultimately this was about right, as I had only a few hundred BOB on me by the time I reached Uyuni (at which point you could again access money).
This was on the basis of staying in relatively cheap accommodation at 30-50 BOB per person per night (or camping for free). As for food, except for a few specific locations on the AT, you're unlikely to be able to splash out, so these costs should be relatively stable (and only slightly more expensive than what you'd pay in other parts of Bolivia). Primarily, how much money you'll need will depend on your accommodation.
Phone battery - To save weight, I decided not to carry a portable battery on the AT. I knew I'd be staying in accommodation relatively frequently and that, based on my normal usage for maps and photos only, with a full charge my phone would last for 4 days.
In the end this worked out fine. However, something I initially hadn't thought about is that some locations along the AT only have electricity while they are running a generator (usually from sunset - around 7.00 pm - until the standard bedtime for tours - around 9.30 pm). This means, for example, that you might not get a full charge if you take your phone to dinner. I made a point of leaving my phone to charge at every opportunity and still rarely got back to a full charge at these places.
It's worth taking this into account together with your usual battery consumption when deciding whether to bring a portable battery on the AT.
Wifi - Before starting the AT I'd assumed that access to wifi could only have improved in the 7 years since Swami completed the traverse. This was a misguided assumption and the reality was much less predictable - for example, there was generally no correlation between the size of a town and whether I managed to access the internet.
It was not uncommon for hostels and hotels to charge extra for wifi access (around 20 BOB), which I almost always declined to pay. The other quirk was that, even if you'd paid for wifi, in places running a generator, you could only use the wifi during the limited time the generator was running.
To be fair, internet access on any hike is a bonus (or arguably a curse, depending on your perspective). But to the extent it's useful, here are my notes on internet access along the AT:
Salinas - Reliable internet in the hotel.
Jirira - No wifi, but the hotel owner hot-spotted Kevin to let him pay her by transfer. I'm sure she'd help you out in an emergency.
Puerto Chuvica - Wifi available in our hotel dining room for a fee.
Julaca - Each of the shops advertised wifi and Almacen Bauti had it, albeit with a weak connection. I was told the hotel will have wifi once it's finished.
San Agustin - The hotel is supposed to have wifi, but I wasn't able to access it given the slightly complicated circumstances when I arrived.
Laguna Hedionda - Ecolodge Los Flamingos had high quality wifi available for free.
Hotel Tayka - Wifi was available for free in the hotel foyer (and maybe the hotel rooms), but the signal was not strong enough to reach the separate building where the guides and I slept.
Huallajara - My hostel offered wifi for 20 BOB, but it would only be available while the generator was running (between about 7.30 and 9.30 pm).


Comments